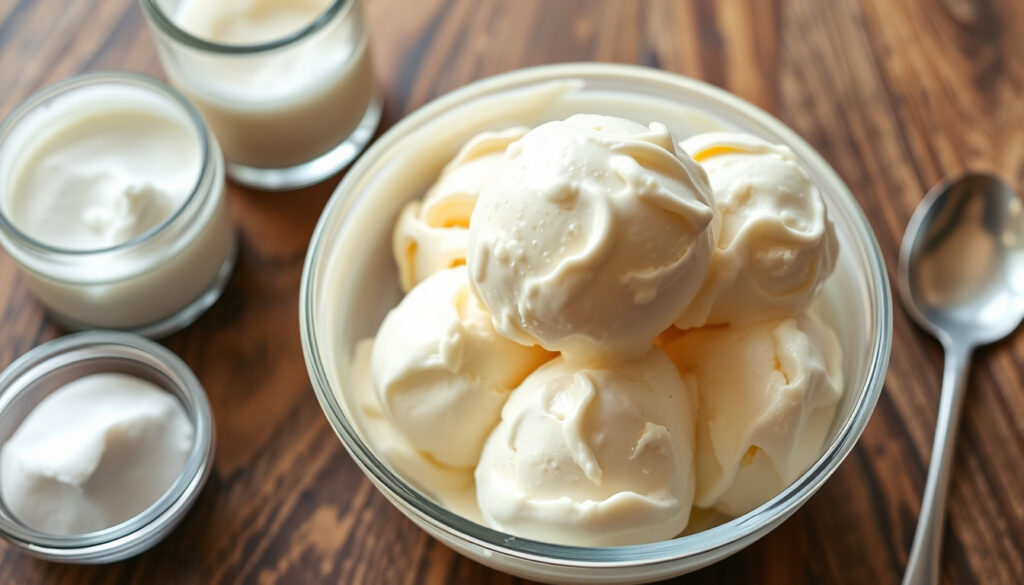
Home Ice Cream – No-Churn Guide to Creamy Results
Ultimate Guide to Making Home Ice Cream at Home
Making ice cream at home has become increasingly popular among home cooks seeking fresh flavors, control over ingredients, and the satisfaction of creating a beloved dessert from scratch. Whether you have a dedicated ice cream maker or prefer to keep things simple with just a few pantry staples, there exists a method suited to every skill level and kitchen setup.
The appeal of homemade ice cream extends beyond taste. By preparing ice cream yourself, you can adjust sweetness to your preference, accommodate dietary restrictions, and experiment with flavors that rarely appear in commercial varieties. The process itself, requiring just a handful of ingredients and minimal equipment, has introduced many beginners to the pleasures of frozen dessert making.
This guide covers the fundamental techniques for creating smooth, creamy ice cream at home, including methods that require no specialized equipment and practical tips for achieving professional-quality results in your own kitchen.
How Do You Make Ice Cream at Home?
The foundation of any ice cream recipe involves combining fat, sugar, air, and water in specific proportions. Traditional methods rely on an egg-based custard that must be cooked and tempered carefully, but modern approaches have simplified the process considerably. Understanding these basic components helps home cooks choose the method that best fits their experience level and available time.
Understanding the Four Main Methods
Each approach offers distinct advantages depending on your equipment, skill level, and time constraints.
| Method | Equipment Needed | Prep Time | Skill Level |
|---|---|---|---|
| No-Churn | Mixing bowls, whisk or mixer | 10-15 minutes | Beginner |
| Bag Method | Zip-lock bags, ice, salt | 15-20 minutes | Beginner |
| Ice Cream Maker | Electric or hand-cranked machine | 20-30 minutes | Intermediate |
| Food Processor | Food processor, frozen fruit | 5-10 minutes | Beginner |
The no-churn method has gained significant popularity because it eliminates the need for any special equipment while still producing a creamy, scoopable result. According to Foodie Crush, this technique relies on whipped cream and sweetened condensed milk to create texture without the complex steps of traditional custard-based recipes.
Essential Ingredients for Basic Homemade Ice Cream
- Heavy whipping cream (minimum 35-36% fat content)
- Sweetened condensed milk
- Vanilla extract or vanilla bean paste
- Salt (a pinch enhances flavor)
- Optional mix-ins such as cookies, fruit, chocolate, or nuts
Recipes from Sugar Spun Run and SugarHero confirm that these four ingredients form the backbone of eggless no-churn ice cream. The high fat content in heavy cream coats ice crystals during freezing, preventing the large, icy texture that plagues poorly made frozen desserts.
| Specification | Details |
|---|---|
| Basic Ingredients | Heavy cream, sweetened condensed milk, vanilla, salt |
| Prep Time | 10-15 minutes active preparation |
| Freeze Time | 4-6 hours minimum |
| Yield | 6-10 servings depending on recipe |
| Calories per Serving | 293-321 kcal for vanilla base |
Does Homemade Ice Cream Need Eggs?
No, homemade ice cream does not require eggs. While traditional French-style ice cream uses an egg custard base, many popular home recipes intentionally exclude eggs for simplicity and safety. The Foodie Crush method confirms that no-churn recipes rely on whipped cream’s aeration and condensed milk’s natural sugars and fats to create richness without any cooking or tempering required.
Can You Make Ice Cream Without an Ice Cream Maker?
Absolutely. Making ice cream without specialized equipment represents one of the most accessible entry points into homemade frozen desserts. Several proven techniques require nothing more than common kitchen tools, making high-quality ice cream achievable for virtually anyone willing to spend a few minutes on preparation.
The No-Churn Method Explained
The no-churn technique has revolutionized home ice cream making by eliminating the most intimidating barrier: equipment cost and storage. According to Our Best Bites, you need only two ingredients—heavy cream and sweetened condensed milk—though adding vanilla brings the total to three. The process involves whipping the cream to stiff peaks, folding in the remaining ingredients, and freezing until firm.
A detailed recipe from Foodie Crush specifies whipping 2 cups of heavy cream to stiff peaks while being careful not to overwhip, as this causes the cream to turn to butter. The whipped cream then gets folded into 14 ounces of sweetened condensed milk mixed with one teaspoon of vanilla. The mixture freezes in a loaf pan for approximately four hours, yielding ten servings at roughly 293 calories each.
The Bag Method for Quick Results
The bag method offers another equipment-free alternative, particularly popular for making small batches and involving children in the kitchen. This technique uses the principle that salt lowers the freezing point of ice, creating a super-cold environment that rapidly freezes the ice cream mixture inside an inner bag.
Is No-Churn Ice Cream as Good as Machine-Made?
No-churn ice cream produces excellent results for beginners and casual preparation, though machine-made ice cream typically achieves a finer texture through continuous agitation that incorporates less air.
The SugarHero recipe emphasizes using the highest-fat heavy cream available for optimal texture. No-churn ice cream tends toward a denser, richer consistency compared to the lighter, more aerated texture of machine-churned varieties. For most palates, however, the difference is subtle and the convenience factor significant.
Storing No-Churn Ice Cream
According to Sugar Spun Run, no-churn ice cream keeps well for one to two weeks when stored properly in an airtight container. Placing plastic wrap directly against the surface before closing the container helps prevent ice crystal formation. Before serving, allow the ice cream to soften at room temperature for five to ten minutes for easier scooping.
What Is the Best Ice Cream Maker for Home Use?
Choosing an ice cream maker depends largely on how frequently you plan to make ice cream, your budget, and whether you have storage space for another kitchen appliance. The market offers several distinct categories, each with advantages and limitations worth considering before making a purchase.
Compressor Models
Compressor ice cream makers represent the premium tier, featuring built-in cooling systems that eliminate the need to pre-freeze bowls. These machines can produce multiple batches in quick succession and generally deliver the creamiest results. They require adequate counter space and represent a significant investment, typically priced higher than other options.
Pre-Freeze Bowl Models
Most affordable electric ice cream makers fall into this category, requiring users to freeze the mixing bowl for twelve to twenty-four hours before each use. Once frozen, the bowl can produce one batch before needing another freezing cycle. Cuisinart offers several models in this style that have received positive reviews for reliability and ease of use.
Why Beginners Often Prefer No-Churn First
Current search results lack comprehensive 2025-specific reviews for ice cream makers, as most testing data predates this year. For those new to ice cream making, starting with no-churn methods allows you to assess your interest before committing to equipment purchases.
As noted in Foodie Crush, no-churn alternatives often outperform basic machines for beginners by skipping the equipment learning curve entirely. Once you master the fundamentals and find yourself making ice cream regularly, upgrading to a quality machine becomes a natural progression.
How Do You Make Creamy Homemade Ice Cream?
Achieving a consistently creamy texture in homemade ice cream comes down to understanding how fat content, sugar balance, and air incorporation work together. Serious Eats provides detailed explanations of the science behind these factors, helping home cooks make informed adjustments to their recipes.
The Science of Creaminess
The fat in heavy cream serves a crucial function beyond richness—it coats ice crystals as they form during freezing, preventing them from growing large and creating that undesirable gritty or icy texture. The SugarHero recipe highlights that heavy cream should contain a minimum of 36% fat for best results. Lower-fat alternatives will produce icier, less satisfying results.
Sweetened condensed milk plays a dual role: providing sweetness and acting as a texturizer. The sugars lower the freezing point of the mixture, keeping it softer than it would otherwise be at freezer temperatures. According to Sugar Spun Run, this eliminates the need for additional stabilizers while maintaining a smooth, scoopable consistency.
Practical Tips for Soft, Creamy Results
- Keep heavy cream cold—refrigerate the bowl and beaters for fifteen minutes before whipping
- Whip cream to stiff peaks only; overwhipping turns it to butter
- Fold ingredients gently in batches to preserve trapped air
- Press plastic wrap directly onto the ice cream surface before freezing
- Use an airtight container to prevent freezer burn and ice crystal growth
Temperature and Timing Considerations
For food safety, the USDA recommends storing ice cream at temperatures at or below 0°F (-18°C). Most home freezers maintain this temperature adequately. When serving, allow the ice cream to rest at room temperature briefly—five to ten minutes—before scooping for the smoothest texture.
As It’s Not Complicated Recipes notes, the classic vanilla base recipe requires just ten minutes of active prep time plus a minimum four-hour freeze. This makes it feasible to prepare ice cream in the afternoon for evening serving, or the night before a gathering.
The Step-by-Step Process
Following a consistent process helps ensure reliable results every time you make ice cream at home. The timeline below applies to the no-churn method, which represents the most accessible starting point for most home cooks.
- Chill equipment – Place your mixing bowl and beaters in the freezer for fifteen minutes before starting
- Combine wet ingredients – Mix sweetened condensed milk with vanilla and salt in a separate bowl
- Whip cream – Beat cold heavy cream until stiff peaks form, typically three to four minutes with an electric mixer
- Fold mixtures together – Gently incorporate the condensed milk mixture into the whipped cream in two or three additions
- Add mix-ins – Stir in chocolate chips, crushed cookies, fruit, or other additions if desired
- Transfer to container – Pour the mixture into a loaf pan or airtight container
- Freeze until firm – Cover with plastic wrap touching the surface and freeze for at least four hours
- Serve – Let rest five to ten minutes at room temperature before scooping
The entire active preparation time totals approximately ten to fifteen minutes, making this a manageable project even on busy weeknights. As SugarHero confirms, the process scales easily—you can double or halve recipes without adjusting technique.
Established Facts and Areas of Uncertainty
When researching home ice cream making, certain aspects are well-documented through multiple sources, while others involve subjective judgment or depend heavily on individual circumstances.
| Established Information | Area of Uncertainty |
|---|---|
| No-churn methods reliably produce creamy, scoopable ice cream | Which specific ice cream maker brand offers the best value |
| Fat content (minimum 36%) directly affects texture quality | Optimal storage duration before noticeable quality loss |
| Sweetened condensed milk eliminates need for cooking | Long-term taste comparison between no-churn and machine methods |
| Proper storage maintains quality for 1-2 weeks | 2025-specific ice cream maker performance rankings |
| No raw egg concerns with no-churn eggless recipes | Individual preference for density versus air incorporation |
The reliability of no-churn methods is well-established across multiple recipe developers, as documented by Foodie Crush, Sugar Spun Run, and SugarHero. However, specific machine performance data remains limited, and individual preferences for texture vary considerably.
Why Does Fat Content Matter in Ice Cream?
Understanding the role of fat in ice cream helps home cooks appreciate why ingredient quality matters and how to troubleshoot problems when they occur. Fat serves multiple functions that directly impact both texture and flavor.
During freezing, water molecules in the ice cream base form ice crystals. Fat molecules coat these crystals, preventing them from growing large enough to create a gritty or sandy texture. This coating function explains why recipes using lower-fat milk or cream tend to produce inferior results—the protection mechanism simply doesn’t work as effectively.
Beyond texture, fat carries and enhances flavor compounds, contributing to the rich, luxurious mouthfeel that distinguishes quality ice cream from watery frozen desserts. The Serious Eats article on ice cream science explains that fat also contributes to overrun—the amount of air incorporated during churning—affecting the final product’s lightness and scoopability.
“The fat in ice cream is not just about richness—it’s a functional ingredient that determines how small the ice crystals stay and how well the flavors develop.”
— Adapted from Serious Eats ice cream science
Final Thoughts on Making Home Ice Cream
Making ice cream at home rewards experimentation while remaining accessible to complete beginners. The no-churn method provides an excellent starting point, requiring minimal equipment and just a few ingredients to produce impressive results. As your skills develop, you can explore flavor variations, invest in specialized equipment, or tackle more complex traditional recipes.
For those interested in expanding their dessert-making repertoire, exploring related techniques like a Sugar Syrup Recipe opens doors to additional flavor profiles and preparation methods. Similarly, understanding regional ingredients through guides like the Coles Margaret River Guide can inspire creative combinations unique to your location.
The most important factor is simply starting. With ten to fifteen minutes of active work and a few hours of patience, anyone can produce ice cream that rivals commercial offerings in taste and freshness while offering complete control over ingredients and customization options.
Frequently Asked Questions
How long does homemade ice cream last in the freezer?
Homemade ice cream typically maintains optimal quality for one to two weeks when stored in an airtight container with plastic wrap pressed against the surface. After this period, ice crystals may develop and the texture can become less creamy.
What is the easiest homemade ice cream recipe?
The simplest recipe requires only two ingredients—heavy whipping cream and sweetened condensed milk. Adding vanilla extract brings it to three ingredients. Whip the cream to stiff peaks, fold in the remaining ingredients, and freeze for four to six hours.
Can I make ice cream without an ice cream maker?
Yes, no-churn methods produce excellent ice cream without any special equipment. These recipes use whipped cream and sweetened condensed milk to create texture, requiring only basic kitchen tools like mixing bowls and a whisk or electric mixer.
Is no-churn ice cream safe for children to help make?
No-churn ice cream is particularly suitable for family cooking because it involves no raw eggs and requires no cooking. Children can assist with measuring ingredients, folding mixtures, and adding mix-ins with adult supervision.
What causes homemade ice cream to become icy?
Icy texture typically results from insufficient fat content, excessive water, or improper storage. Using heavy cream with at least 36% fat, pressing plastic wrap directly on the surface before freezing, and using airtight containers helps prevent ice crystal formation.
How do I fix ice cream that’s too hard in the freezer?
Allow the ice cream to sit at room temperature for five to ten minutes before scooping. For future batches, the Sugar Spun Run recipe notes that sweetened condensed milk helps keep the texture soft due to its sugar content lowering the freezing point.
What are popular mix-ins for homemade ice cream?
Popular additions include chocolate chips, crushed cookies, fresh or frozen fruit, nuts, caramel sauce, and candy pieces. According to Foodie Crush, mint cookies and salted caramel represent particularly popular flavor combinations.
More related posts
 Becca Bloom: Bio, Wealth, Husband, and Family Background
 How to Stop Snoring: Causes, Treatments & When to See a Doctor
 28 Years Later Release Date – Cast, Plot, Trailer Details
 What Is 67 Meme – Origin, Meaning, TikTok Trend Explained
 Tara Sutaria Biography: Age, Boyfriend, Religion, Family & Movies
 Elliott Smith: Death, ‘Miss Misery’, and Cobain/Buckley Links
 Karen Fukuhara: Biography, The Boys Role, and Ethnicity
 Place Value Chart: Definition, Examples & Printables
